Showing posts with label Yarn. Show all posts

Sunday, September 27, 2015

Welcome Fall with a Crochet Door Bumper


Disclaimer: This is only a pattern review. The original pattern is not mine and can be found here. Changes I made to the pattern are given in this post as well and these changes are mine.

Fall is here and the weather is beginning to change, although in my hometown the changes are harder to feel. As the weather begins to cool, the wind blows, and the doors in the house begin to bang when they are closed. Well maybe not if you live in a newer house, but if your house is older then you will understand and appreciate this post. My house was built in the 70's, but the doors still have a tendency to bang due to poor construction or a crooked foundation. There is one door in particular that can be heard with a loud bang every time it is shut. Despite how annoying this is, I actually didn't go in search of this pattern, but stumbled across this pattern while searching Pinterest for quick yarn stash busters. A pattern for a door bumper came up in the search and I had an idea: I could use up some of my yarn and solve a problem. I quickly grabbed my supplies and made the door bumper in 10 minutes.

As I mentioned I found this pattern on Pinterest as part of a collection of patterns posted, but the original pattern was written by Crochet Dynamite and can be found on her blog Crochet Dynamite!. In her post she speaks of living on an old farmhouse and the creaking of doors, which is the inspiration behind her pattern. She also included a revised pattern to make a different style door bumper, but I chose to use the simple pattern because I wanted a quick project.

Option Two: Button Closure
When I am trying a new pattern, I don't read over the entire pattern prior to starting so I don't know if there is a problem in the pattern until I have already started, which can potentially be problematic. However, this pattern was well written and easy to follow. I didn't find the need to make any adjustments until the very end and then I only made a single adjustment to the closure. The original pattern calls for a tie closure on one end, but even the creator said the piece has enough stretch that you don't need the tie closures. If you don't use the tie closures then you have two options. Option one is to sew the ends of the pieces together to create a loop for the door. Option two is to create a loop on one end and sew a button on the other, which is what I chose to do.


These finishing options are my own original ideas and are not a part of the original pattern. An alternative option, that I thought of as I was writing this, is to connect the loop as you construct the entire piece. The pattern for this is listed below:

Alternate Pattern 
Chain 36
Round 1: Single crochet in 2nd chain from hook, single crochet in each chain across, chain 1, turn.
Rounds 2-4: Single chain in each single chain across, chain 1, turn.
Round 5: 2 single crochet, chain 10, skip 10, 13 single crochet, chain 10, skip 10, 1 single crochet, chain 1, turn.
Round 6: Single chain across, 2 single crochet, chain 1, turn.
Rounds 7-9: Single chain in each single crochet across, chain 1, turn.
Round 10: Single crochet across, 3 single crochet, turn, continue to single crochet around entire piece with 3 single crochet in each corner, slip stitch to join, fasten off.
Weave in loose ends.


In the alternative pattern I used the stripe pattern Crochet Dynamite used. I made mine using the Oakland A's colors. As you can see there are so many possibilities in making these in your own favorite colors or to fit a theme. I think these would be great for a nursery and would make great baby gifts. If I made them for a nursery I would use the button closure option and then use a cute button that matched the nursery theme. What colors would you use?

Friday, January 30, 2015

Pattern Review: Crochet Cloche Hats

Crochet Cloche Hats - FREE Pattern
Crochet Cloche Hats

A few weeks ago I was challenged to make one of these hats for one of my little cousins. The picture came from a Facebook post that was shared to my page and the post included a link to the pattern. My response, as it usually is, was that I would look over the pattern and give it a try. Unfortunately, what I didn't know at the time was that the original pattern was written in Russian. The link had another link for the pattern translated into English. This link is the link I used when trying to make the cloche hat.
I spent hours trying to decipher the pattern and have the instructions make sense. Finally I gave up on the written instructions and just focused on the pictures, but unfortunately the pictures didn't show each step of crocheting the cloche hat. In trying to make the pattern work I read the translator's note, which said that the translation was considered troublesome for many people in trying to make this hat. I was very frustrated when I read this because I don't think the translator should have shared the pattern, knowing the translated pattern was done poorly and therefore unusable. I then used Google to try to find a crochet stitch to replicate the pattern, but couldn't find the exact stitch.
Since this hat was meant to be a gift for one of my little cousins I continued working on replicating the hat shown in the picture and managed to make my hat look similar to the hat pictured, although far from identical. I am still working on finishing the floral applique for the crochet cloche hat, but I think my cousin will enjoy wearing it for Easter. I still need to find green yarn to make the leaves, but then I will post pictures of the final hat. If this hat is something that you want to see more of then please leave a comment below. I will be posting more hats for Easter in the next coming weeks.

*********************************************************************************
Update: finished pictures of the Easter Hat


Sunday, January 25, 2015

Stash Buster: Infant Dress and Diaper Cover

If you have children, work with children, or have been around children in the last few months then you no doubt have heard all about Frozen. Frozen was even quite the hit with many adults. I personally have not seen Frozen, but one of my coworkers is a huge fan of Frozen. This coworker is pregnant with her first child, a girl, and I have been wondering how to incorporate Frozen into her baby gift. Then as I was working on another project, the crochet rug from last week's stash buster post, I noticed some white tulle and became inspired. This was the first time I made an infant dress with tulle and yarn as the primary materials. I was a bit hesitant with the outcome, but was pleasantly surprised with the result. This project ended up using several of my crating materials, including all of my white tulle, much of my Red Heart Super Saver yarn in Turqua, and almost all of my snowflake rhinestones. 


I haven't had the time to turn this project into a written pattern, but I can give you a general idea of how I created this infant dress. First, obtain a pattern for the size bodice you want to make. I used my own basic pattern for sweaters and bodices, but there are several great patterns available. I then used a size G crochet hook and the Red Heart Super Saver Yarn in Turqua to crochet the bodice, but stopped before achieving the finished length. I stopped an inch under the armpits of the bodice. I then cut strips of the tulle to form the skirt. I didn't measure the tulle length, but just estimated the desire length of the skirt, and then cut all of the strips of tulle the same size. A helpful hint is to double the length of the skirt when cutting the strips of tulle. Doubling the length allows you to create the skirt without sewing. To attach the tulle strips to the crochet bodice I used a crochet hook and the no-sew method for creating tutus. Fold the tulle strip in half and pull the loop through one of the crochet loops on the bottom of the bodice and then pull the tulle ends through the tulle loop. Pull the ends tight and adjust the tulle so it lays flat against the bodice. Continue in this method until each crochet stitch along the bottom of the bodice has a strip of tulle attached.

Once the tulle skirt was finished I then took fabric glue and attached rhinestone snowflakes in various shades of blue to the strips of tulle. Alternatively you can use sequins. If your strips of tulle are uneven you can trim the tulle, but I recommend steaming the skirt before trimming. Another way to steam tulle is to hang it in the bathroom while you take a shower. The steam from the shower will  cause the tulle to straighten, allowing you an accurate depiction of skirt length. I chose to add rhinestone buttons to the bodice, but this might not be necessary depending on the bodice pattern you used. 

Since I used white tulle that is transparent I decided it was important to make a matching diaper cover. Using the same yarn and crochet hook used in the dress I made a diaper cover. Once again I have not had the time to write a pattern for the diaper cover, but diaper covers are very easy to make. Once the diaper cover was finished I cut pieces of Velcro and attached the Velcro to the diaper cover. I didn't add any embellishments to the diaper cover because it will be covered by the tulle skirt, but if the diaper cover were to be shown I would add a snowflake to the back of the cover.

If you are interested in the pattern for this Frozen-inspired tutu infant dress, please leave a comment below. I was really happy with how this dress came out and look forward to making more tutu dresses. If there are any other tutu dresses you want to see, let me know and I will give them a try.

Tuesday, April 8, 2014

Charity of the Month: Beautiful and Bald Movement

It is April 7th, which means it is time for this month's charity, Beautiful and Bald Movement. This charity is a personal favorite of mine because of the support they offer to women and children with hair loss due to cancer treatments, alopecia, or trichotillomania. This nonprofit organization was founded by a few women, who were personally responsible for spearheading a social media campaign with the goal of creating a bald Barbie doll for little girls. Since the start of their campaign, Mattel has made 10,000 bald Barbies, which were donated to children's hospitals, MGA made a collection of 6 True Hope dolls in their Bratz and Moxie doll lines, which were available for purchase through ToysRUs, and American Girl started offering their custom dolls without hair along with allowing girls to send their dolls to the American Girl hospital to have their hair removed. Besides spearheading the social media campaign these women have also created and sent out thousands of Dome Decorating packages.

Each Dome Decorating package contains headbands, scarves, stickers, and temporary tattoos for decorating the recipient's newly bald head. The women are constantly in need of donations for these packages and ask crafters for fun headbands, headwraps, etc. to be made for these packages. Last year I donated several handmade headbands, crocheted from my own original pattern, to the Beautiful and Bald Movement. However, I cannot find the photo collage I made using the pictures of these headbands. I am actively looking for the picture and will upload the photo as soon as I can locate it. This year I have made a headband, using another original pattern, that better fits current trends and this pattern is the pattern I am sharing below.

Crochet Ribbed Headband

Materials:
Red Heart Super Saver yarn, color of choice
Crochet Hook Size G
3 Buttons, for closure
Flower embellishment, optional

Directions:
Row 1 - Cast on 8, single crochet all stitches, turn
Row 2 - Single crochet in back loop only, this is the start of the rib stitch, turn
Row 3-4, Repeat row 2, turn
Row 5 - Increase in first and last stitch of row, turn
Row 6-8 - Repeat row 5, turn
Row 9-53 - Continue rib stitch, no increase, turn
Row 54 - Decrease in first and last stitch of row, turn
Row 55-57 - Repeat row 54, turn
Row 58-63 - Continue in rib stitch, creating button loops over 5 rows
Cast off

Finishing:
Cut off remaining yarn and weave in loose ends. Attach buttons to cast on edge so they line up with button loops on cast off edge. Attach a  flower embellishment.


These headbands are quick and easy to make, which makes the headbands a perfect donation for the Beautiful and Bald Movement. Information about requesting a Dome Decorating package or donating your headbands can be found on the Beautiful and Bald Movement's website, which is linked above. At the time of writing this post the website was down, but hopefully will be working again at time of post.

Friday, March 28, 2014

Etsy Update and Viewer Poll

I have been fairly busy lately with many projects and more hours at work that I have been neglecting my Etsy shop. It has been almost two months since I added anything to my shop, patterns or products, and I have been contemplating updating my shop. I have a few ideas in mind for spring, but would love my readers' input for what to includei in my Etsy shop.

Which hat or hats, pictured below, would you like to see in my Etsy shop? Leave your comment below.

Monday, March 3, 2014

Quick Gifts: Baby Blanket Play Mat


Today is March 3rd, which means it is time for another quick gift idea. This month's gift idea and tutorial is for  Pastel Baby Blanket Play Mat. In a previous post I showed pictures of my sketch for this blanket, the yarn used, and the progress made on this blanket. The blanket is now finished and I am happy to be able to share this pattern with my readers. I love how quickly this blanket worked up and it is definitely a quick project for a lazy weekend at home. I designed the pattern as a baby play mat, but when the play mat was finished it ended up doubling as a blanket too. I used chunky yarn so the blanket play mat would be thick to provide maxim comfort for a little one playing on the floor. 

Pastel Baby Blanket Play Mat

The materials needed are: 

5 skeins of Bernat Softee Chunky Yarn in Baby Pink,
2 skeins of Bernat Softee Chunky Yarn in Sleepytime
1 skeins of Bernat Softee Chunky Yarn in Baby Blue
Crochet Hook Size N

Project instructions:

With crochet hook Size N and Bernat Softee Chunky Baby Pink, cast on 60 stitches. Cast on 1, single crochet in each stitch across. Continue for 14 rows or until skein of yarn is used up.
Switch to Bernat Softee Chunky Baby Blue and crochet in each stitch across for 3 rows.

Switch to Bernat Softee Chunky Baby Pink and continue to crochet in each stitch across for 42 rows or until you have finished 3 skeins of Bernat Softee Chunky Baby Pink Yarn.

Switch to Bernat Softee Chunky Baby Blue and crochet in each stitch across for 3 rows.

Switch to Bernat Softee Chunky Baby Pink and continue to crochet in each stitch across for 14 rows or until skein of yarn is used up.

Switch to Bernat Softee Chunky Sleepytime and crochet a border around the edge of the blanket. The amount of rows depends on border preference.


Monday, February 3, 2014

Quick Gifts: Basic Crochet Hat

It is February 3rd, which means it is time for a quick gift idea. While each item I will post makes an excellent gift for a loved one, all of the gifts also make wonderful donations for local charities. I personally love to collect patterns or ideas for items that can be made in a day or a weekend. I usually make a portion of these patterns and store the items away to use as last minute gifts. This month's gift is one of those patterns I encourage my readers to make in advance and store. This pattern is a great gift for the little one in your life,  but also is an adorable donation to local charities. 

Since it is February and freezing in every state except California, this month I will be sharing my pattern for a simple crochet baby hat using Red Heart Super Saver Yarn. The pattern is super basic for beginners, but easily customized for advanced crocheters. I currently have a dozen of these hats made in various stages of customization for each season this year and have made countless others for gifts or donations.

Basic Crochet Hat

Pattern instructions written for newborn, toddler, and adult sizes (small/woman's and large/man's). Read instructions carefully to see where the increase stops for the size you are making. Ending stitch count for all hat sizes is in parentheses at the end of each round for instructions for all hat sizes.

Estimated time to complete is a few hours, depending on embellishments used.

Materials Needed:
1 skein of yarn in color of choice
Crochet hook size G
Yarn Needle, optional
Embellishments, optional

Directions
Round 1. 
Make a slip knot on crochet hook, chain (ch) 6, slip stitch (sl) to join, being careful not to twist.
Round 2.
Ch 1, 2 single crochet (sc) in each stitch (st), sl to join first st (12 st)
Round 3.
Ch 1, *2 sc in next st, sc in following st, repeat from * around, sl to join. (18 st)
Round 4.
Ch 1, *2 sc in next st, sc in next 2 st, repeat from * around, sl to join. (24 st)
Round 5.
Ch 1, *2 sc in next st, sc in next 3 st, repeat from * around, sl to join. (30 st)

For newborn size only stop increasing and sc in each st for 10 rounds.
For all other sizes continue to  increase.

Round 6.
Ch 1, *2 sc in next st, sc in next 4 st, repeat from * around, sl to join. (36 st)
Round 7.
Ch 1, *2 sc in next st, sc in next 5 st, repeat from * around, sl to join. (42 st)

For toddler size only stop increasing and sc in in each st for 8 rounds.
For adult sizes continue to increase.

Round 8.
Ch 1, *2 sc in next st, sc in next 6 st, repeat from * around, sl to join. (48 st)
Round 9.
Ch 1, *2 sc in next st, sc in next 7 st, repeat from * around, sl to join. (54 st)
Round 10.
Ch 1, *2 sc in next st, sc in next 8 st, repeat from * around, sl to join. (60 st)

For adult small (woman's) size only stop increasing and sc in each st for 5 rounds.
For adult large (men's) size continue to increase.

Round 11.
Ch 1, *2 sc in next st, sc in next 9 st, repeat from * around, sl to join. (66 st)
Round 12.
Ch 1, *2 sc in next st, sc in next 10 st, repeat from * around, sl to join. ( 72 st)
Round 13.
Ch 1, *2 sc in next st, sc in next 11 st, repeat from * around, sl to join. (78 st)
Round 14.
Ch 1, *2 sc in next st, sc in next 12 st, repeat from * around, sl to join. (84 st)
Round 15.
Ch 1, *2 sc in next st, sc in next 13 st, repeat from * around, sl to join. (90 st)

ALL SIZES
Round 15-17
Ch 1, sc in each st around, sl to join (30, 42, 60, 90 st).
For newborn size only, cut yarn and bind off after round 17.
Round 18-20
Ch 1, sc in each st around, sl to join (42, 60, 90 st).
For toddler size only, cut yarn and bind off after round 20.
Round 20-24
Ch 1, sc in each st around, sl to join (60, 90 st).
For small adult (woman's) size only, cut yarn and bind off after round 24.
Round 25-28
Ch 1, sc in each st around, sl to join (90 st).
For large adult (man's) size only, cut yarn and bind off after round 28.

For all sizes weave in lose ends and embellish hat as you wish.

____________________________________________________________________

These are some of the hats I have made using this pattern. As you can see adding embellishments can really transform these hats into something adorably cute and a priceless gift for the children in your life. If the pattern or hat is listed for sale on my Etsy Shop, BooBear Designs, then a link is posted as a caption under the photo.


Chargers Football Hat
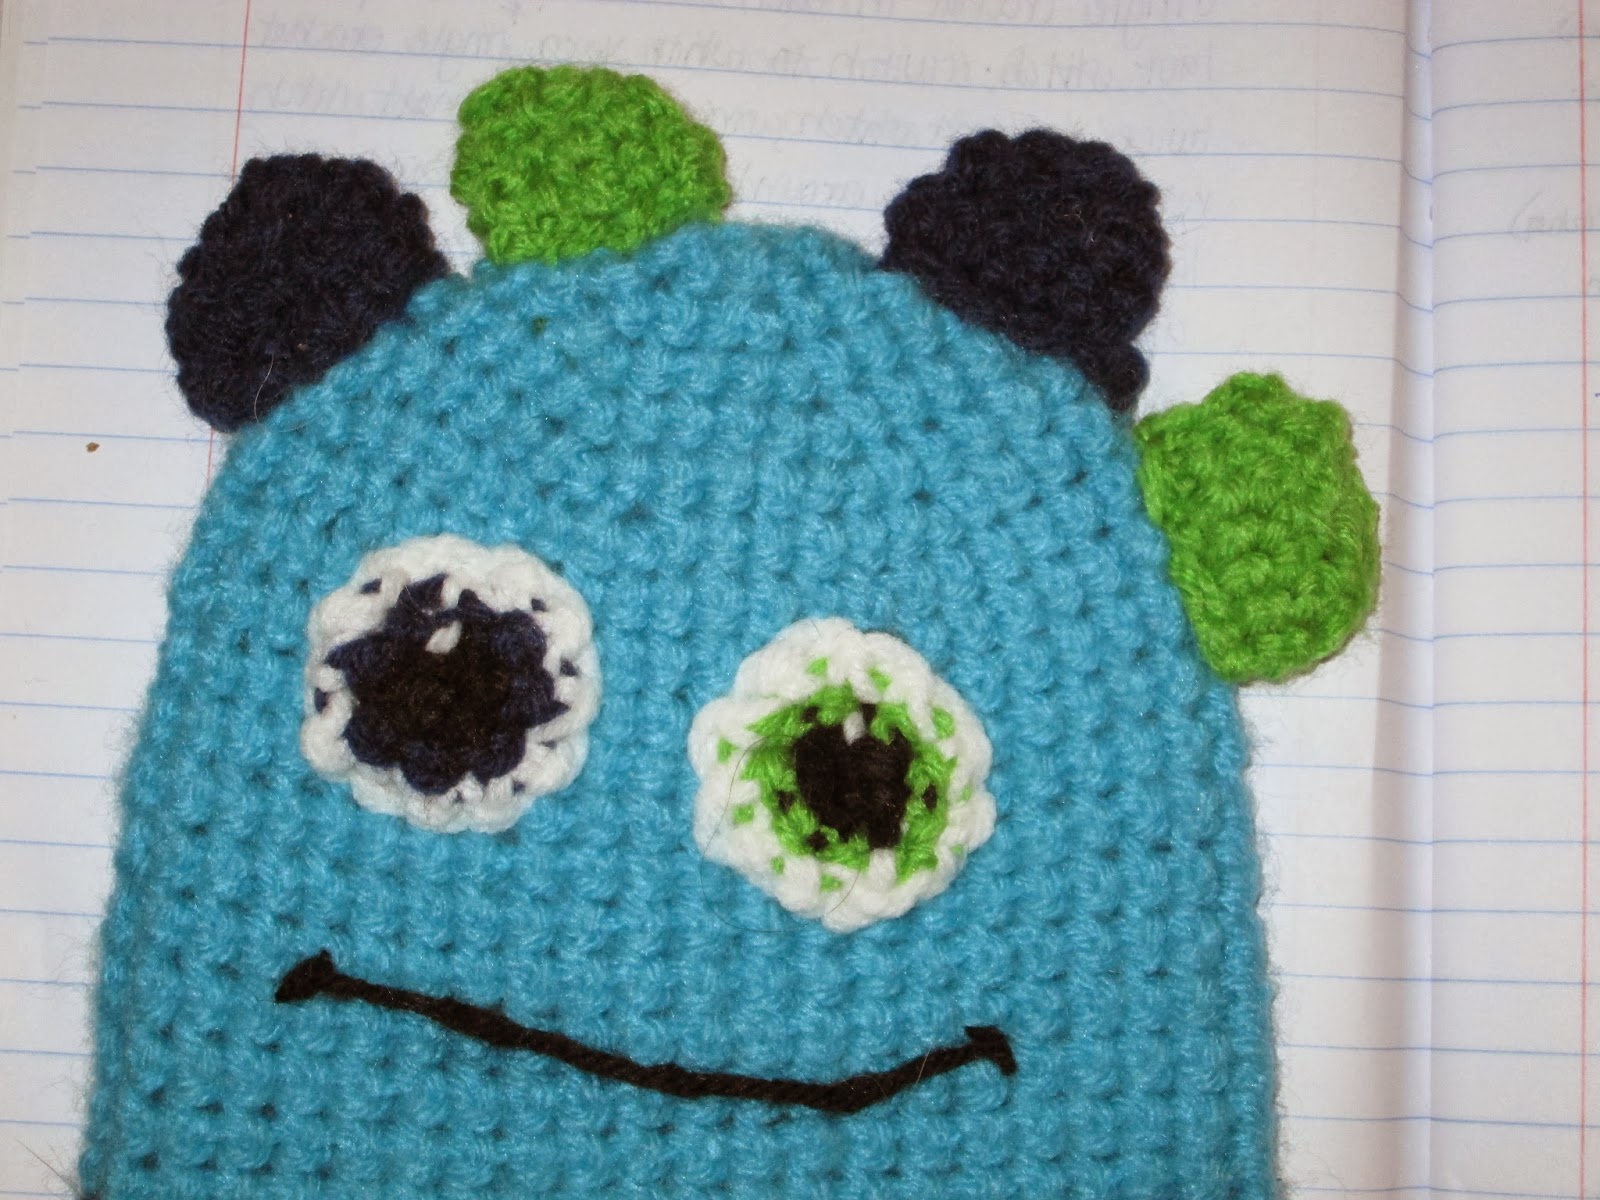
Mike Monster Hat


Sunday, February 2, 2014

Take Me Out To The Ball Game...

Last Sunday was Super Bowl Sunday, which means football is over.
The end to football means the start of baseball season. My New England Patriots lost in the AFL Championship Game and since then I have looked forward to opening day for the Oakland Athletics. As part of my excitement my crafting focus has transitioned from football team hats to baseball hats and team shirts. I am currently working on 4 projects for the Oakland A's season and they are all in various stages of completion. Some will be gifts and others will be sold on Etsy, either in pattern or product form. I don't know which product I am most excited to see completed, but I do know I am ready for all of the projects to be completed. As I write this I am already thinking of more project ideas, which I will probably be sketching soon.

The first project I am working on I thought of during a playoff game in October 2013. After Game 2 of the series, which I was fortunate to watch in person, I was compelled to have a Sonny Gray t-shirt, but when I looked for a shirt online I was unable to find one. Joking with my cousin I came up with the idea for my own Sonny Gray t-shirt. The design is based on a song from the 1970's. I was able to paint my design on a gray t-shirt using fabric paint and freezer paper as a stencil.

The next project was born shortly after this game, after a season's worth of lugging my things around in various bags, without ever being able to store everything. I had a rough idea of what I wanted the bag to look like, but I still needed specifics to make the tote bag truly functional. I started with an inventory list of everything I wanted or needed and then began to sketch out my ideas. I am really pleased with the layout of the bag. I began cutting and sewing the pieces last November, but never finished due to a plumbing emergency. Due to another's human error my toilet ended up broke and my room flooded, which postponed everything and put my craft corner in disarray.

The last two projects are inspired by this month's Fan Fest and the birth of my adorable little cousin. The crochet baseball cap is nearly finished and the yarn is embroidered felt logo is so adorable. I have a rough idea of the baseball hat, but haven't sketched anything or started on this project, beyond actually purchasing the yarn. As always, this and all of my finished projects will be posted on my Facebook design page.

When my craft corner is finally put back together I will definitely be creating more and of course posting more project ideas as well as tutorials. Until then I will post when I can and only projects I can create in my limited space. Be sure to comment below with your own ideas for baseball themed craft projects or projects you want to see in future posts.


Use coupon code FOOTBALL50 at my Etsy Store BooBear Designs for 50% off of my Football Team Hats. This coupon expires February 28th. 

Wednesday, January 15, 2014

Yarn Storage

"Don't wait for tomorrow what you can do today." Unfortunately, sometimes what you want or could do today often gets put off until tomorrow. This is exactly what happened with the current pattern inventory binder post I am writing. I started writing, with every intent of posting, and then I became busy with the work week. I wish I had the luxury of only working on craft projects and that I was able to support myself on those projects alone, but I am not yet able to do that and so I work. I actually enjoy my work quite a bit, except of course when I am too exhausted to work on my passion, crafting. Anyways, the binder post is coming, but it might take more time than I originally anticipated. However, I am typing it up as a tutorial so my readers can get more use of the post itself. 

I am working on a few other tutorials as well, including patterns for quick baby play mat blankets and basic crochet hats. As I work on these tutorials though I am caught by the massive amount of yarn and other crafting supplies I have, which of course makes me think about the maximum way to store all of my supplies. I am especially fascinated by yarn storage because I am boxes and boxes of yarn whether it is yarn I bought or yarn that was given to me. As I mentioned earlier, I am cleaning out a dresser to turn it into yarn and fabric storage, but this wouldn't be my first choice, largely because I like to be able to see my yarn.

I am addicted to storage and organization solutions, that are both functional and creative, and so I frequently search for craft storage ideas online. I usually use key phrases like "DIY Craft Storage Solutions", "Craft Room Storage Ideas", or "Yarn [specific supply] storage ideas" in a Google image search. Through these I have found some wonderful, creative, and functional storage solutions for my craft space or future craft room. I recommend saving any ideas you like to a folder on your computer for inspiration. You might not be able to implement them right now, but you might be able to at a future time. Through these searches I have saved hundreds of images. Most of these images are similar, but I save them because when I decide to implement these storage solutions I can then implement specific thing I like from each idea. 

Anyways, yarn storage is a particular favorite of mine because I like my yarn displayed, but most of the yarn storage is too small for my needs. However, through these searches I found a few unique storage solutions I just adore. The first is taking a shoe organizer and putting it in a bookcase or stacking it atop of Closetmaid organizers. Once your organizer is in place begin filling the cubbies with all of your balls of yarn. This is great if you have a small to medium amount of yarn. I think the biggest shoe cubbies I have seen hold 36 shoes. If you have seen a larger shoe cubby leave a comment below telling me how many shoes (or balls of yarn) it can hold and a link if you have it. :)

Another idea I love is using a peg board and nails. There was a picture of a lady in front of a wall, lined entirely with peg board. She then spaced nails evenly across the entire wall and inserted each nail in the middle of a ball of yarn. Now if your yarn is multi-fiber you might have to use something else in place of a nail to prevent fraying or snagging of your yarn. This idea is great for any size yarn collection because you can always add more peg board. However, you are limited by the wall space available and your budget because peg board can be expensive. If I were going to use this method I would look for refurbished or used peg board at thrift stores and Habitat for Humanity stores. Another option, if you don't mind poking holes in your walls, is to just put the nails directly in the wall.

If you or someone you know is good with their hands then you can always build your own custom yarn storage. I love this diamond patterned wall cubby to hang above your work desk. While I have not attempted to make this yarn storage, I think the storage would be fairly simple to make, but again, I haven't tried to make this myself. If I do make this storage I will be sure to offer a tutorial for my readers. This storage provides design and function, which in my opinion can't be beat.

The final yarn storage pictured I just stumbled upon today and am captioning it Budget DIY Yarn Storage. While I don't know how much this person spent making this particular yarn storage, I think it could easily be remade on a budget. From the picture it looks like the person made the storage out of milk crates. Depending on where you live, who you know, etc. these milk crates could be free or obtained for very cheap, but if you are unable to get them for free I believe the Dollar Store carries them too. If my calculations are correct, to make this storage would take 28 milk crates. The crates could easily be hung on the walls using nails. As you can see from the picture, this yarn storage would probably hold the most amount of yarn.

There are so many wonderful ideas for yarn storage. I encourage all of my readers to Google yarn storage. Please comment below with your own yarn storage ideas and if you want me to do a yarn storage tutorial on either the diamond wall cubby or the milk crate storage. And hopefully, the next post will be the tutorial for the current pattern inventory binder.

Sunday, January 12, 2014

Resolutions for Creative People

 
10 Resolutions for Creative People
I stumbled across this video after I broke resolution #2, "Finish old projects before starting new projects." :-/ Oh well, there is always next year!

Bernat Softee Chunky Yarn
I don't know about you, but if you're like me you can't pass up a sale on materials, whether it is yarn, paper, or fabric. I went into Michael's today, intending only to buy white onesies for my current Valentine's projects, but ended up walking out with 8 balls of yarn too! I didn't need this yarn or necessarily have any plans for it at the moment I bought it, but each ball was on clearance for $1.99. That was a deal I couldn't pass up.
 
Of course, I immediately started working on a project (a baby blanket) as soon as I got home, forsaking all other projects. The yarn is chunky so the blanket is crocheting up quickly, but I recognize my need for resolution #2. For me, two things frequently prevent me from finishing old projects before starting new projects. When I become inspired I immediately start thinking about the inspiration and what I would do differently, and then I want to get the materials, assuming I don't already have the things I need, and get to work. Second, I often forget what projects I was working on after I have been working on a new project(s) for awhile. These are my setbacks as a designer, but I know there are many other reasons people don't maintain projects until they are completed.
 
Sketch of blanket included in project's binder
However, hopefully whatever these reasons are these solutions will work for everyone. The first solution I have for preventing forgetting current projects is to keep a current project inventory binder or notebook. I personally am organizing my project inventory into a binder because page protectors make excellent pockets for storing patterns, project description, sketches, pictures of inspiration, and a list of materials needed to complete the project. A contents list at the beginning of the binder serves as a quick list for me to see what I have and where to find it within the binder. Hopefully, your binder won't be as thick as mine and you won't have to rely on a contents list. As my binder begins to be completed, I will be sure to post pictures so you can clearly see how I organized my ongoing projects.
 
After your current projects are organized, I suggest you resolve not have more than a set number of projects at one time or not to start any more until half of your current projects are finished. I have always wanted to implement this solution, but never set a number for me to keep, which meant I had no accountability to myself. I am now setting my current project number to 7. Until I am caught up on past projects, this number will not include projects I have not worked on for more than a year. I am using another inventory binder for projects I would like to start in the future, but you could always add a section to your project's binder for future projects. Again, I suggest organizing each project with sketches, pictures, patterns, and a list of supplies needed to complete. Organizing all of these things into a single spot makes it easier for you to start your next project and to identify what you need before you start.
Inspired sketch for future project
Taking the time to sketch out your ideas and then planning the completion of a new project satisfies your need to see it completed without actually starting a new project. I implemented this technique when I was working on the baby blanket shown above and was inspired to create another baby blanket using a similar pattern and yarn. Inspired, I immediately stopped working and pulled out my sketch book, and then began to sketch out my design. After I finished sketching I wrote down on a post it note the supplies I thought I would need. This supplies list will become more professional looking when I finish the current blanket and see if my estimate was correct.
 
Taking the time to organize your projects into a binder or notebook, that can then be stored in a prominent location in your workspace, keeps all of your projects at the front of your mind and everything you need easily accessed when you decide to start a project again. But how do you store the actual projects and the supplies necessary for completion?
Ziploc Storage Bags
My projects are temporarily being stored in bins and boxes as I begin to clear out and organize the dresser these projects will be stored in, along with yarn and fabric. In the dresser, I will ultimately store the projects in a Ziploc gallon storage bag, depending upon the size, along with everything I need to complete the project. I suggest labeling each bag, maybe even including the date started as another way of preventing you from keeping a project for too long, and then storing them away. This is a great solution for storing your current projects, but as I mentioned earlier there are some projects that you haven't touched in over a year. There are many reasons you haven't worked on a project for an extended period of time and that reason will determine how you deal with storing those projects.
 
Some projects are left unfinished because you ran out of supplies, but never bothered to get the supplies needed or maybe those supplies were too expensive. For these projects, you need to determine if you want to spend the money to obtain the necessary supplies and complete the project. If you decided to get the supplies then the new supplies and the project itself should be stored with your other current projects. I suggest setting a deadline for yourself to finish the project, otherwise you may end up with it sitting for another year again. If you do not want to buy the necessary supplies, whether the materials are too exensive or you no longer want to complete the project, I suggest taking the project apart, dismantling each material, and then adding the usable materials to your current unused supplies.
 
Other projects are left untouched because you ran out of supplies and then the supplies were discontinued by the manufacturer. This reason is a good example of why you buy all of the supplies you need to complete a project in the first place, but I understand this is not always possible and I have found myself in this same situation before. There are really only two options available to you at this point. You could search for the discontinued materials online and might get lucky or, unfortunately, you have to dismantle the project and find a new use for those discontinued materials.
 
As I said earlier, I have been there, and I currently have left that project unfinished. At the time I bought the yarn, I didn't have any project in mind, and when I did, the yarn was discontinued. I did look online and even in stores for the discontinued yarn, but was unsuccessful in finding the yarn I needed. However, I did have enough yarn to reconstruct the exsisting blanket into a lapghan, but never had the heart to unwind all of my hard work. While I wouldn't encourage anyone to just leave their project in this state, it may actually have worked in my favor because the company ended up introducing a similar yarn. I haven't brought my project, or a small sample of my yarn, into a craft store to confirm the match, but the appearance is similar. If the yarn is a match, then I fortunately have a third option available to me. However, this is very rare.
 
Finally, at least as far as my experience goes, there are projects that you have left unfinished, not because you don't want to finish them, but because you have simply forgotten about them. These projects are the main reason behind the current project binder inventory. If you have these projects, and still want them finished, then I suggest you add them to your inventory binder or notebook, along with a date for when you want this project finished. Again, the date is not a deadline so much as a means of keeping you accountable to yourself, and preventing a pile of unfinished projects.
 
In an upcoming post I will be showing pictures of my binder inventory system, hopefully my project storage, and how I organize my craft bag. For pictures of my completed projects be sure to check out my Facebook page BooBear Designs. In the next few weeks fans of my Facebook page will be eligible to win a free pattern.