Showing posts with label Crochet. Show all posts

Sunday, September 27, 2015

Welcome Fall with a Crochet Door Bumper


Disclaimer: This is only a pattern review. The original pattern is not mine and can be found here. Changes I made to the pattern are given in this post as well and these changes are mine.

Fall is here and the weather is beginning to change, although in my hometown the changes are harder to feel. As the weather begins to cool, the wind blows, and the doors in the house begin to bang when they are closed. Well maybe not if you live in a newer house, but if your house is older then you will understand and appreciate this post. My house was built in the 70's, but the doors still have a tendency to bang due to poor construction or a crooked foundation. There is one door in particular that can be heard with a loud bang every time it is shut. Despite how annoying this is, I actually didn't go in search of this pattern, but stumbled across this pattern while searching Pinterest for quick yarn stash busters. A pattern for a door bumper came up in the search and I had an idea: I could use up some of my yarn and solve a problem. I quickly grabbed my supplies and made the door bumper in 10 minutes.

As I mentioned I found this pattern on Pinterest as part of a collection of patterns posted, but the original pattern was written by Crochet Dynamite and can be found on her blog Crochet Dynamite!. In her post she speaks of living on an old farmhouse and the creaking of doors, which is the inspiration behind her pattern. She also included a revised pattern to make a different style door bumper, but I chose to use the simple pattern because I wanted a quick project.

Option Two: Button Closure
When I am trying a new pattern, I don't read over the entire pattern prior to starting so I don't know if there is a problem in the pattern until I have already started, which can potentially be problematic. However, this pattern was well written and easy to follow. I didn't find the need to make any adjustments until the very end and then I only made a single adjustment to the closure. The original pattern calls for a tie closure on one end, but even the creator said the piece has enough stretch that you don't need the tie closures. If you don't use the tie closures then you have two options. Option one is to sew the ends of the pieces together to create a loop for the door. Option two is to create a loop on one end and sew a button on the other, which is what I chose to do.


These finishing options are my own original ideas and are not a part of the original pattern. An alternative option, that I thought of as I was writing this, is to connect the loop as you construct the entire piece. The pattern for this is listed below:

Alternate Pattern 
Chain 36
Round 1: Single crochet in 2nd chain from hook, single crochet in each chain across, chain 1, turn.
Rounds 2-4: Single chain in each single chain across, chain 1, turn.
Round 5: 2 single crochet, chain 10, skip 10, 13 single crochet, chain 10, skip 10, 1 single crochet, chain 1, turn.
Round 6: Single chain across, 2 single crochet, chain 1, turn.
Rounds 7-9: Single chain in each single crochet across, chain 1, turn.
Round 10: Single crochet across, 3 single crochet, turn, continue to single crochet around entire piece with 3 single crochet in each corner, slip stitch to join, fasten off.
Weave in loose ends.


In the alternative pattern I used the stripe pattern Crochet Dynamite used. I made mine using the Oakland A's colors. As you can see there are so many possibilities in making these in your own favorite colors or to fit a theme. I think these would be great for a nursery and would make great baby gifts. If I made them for a nursery I would use the button closure option and then use a cute button that matched the nursery theme. What colors would you use?

Wednesday, March 4, 2015

Reverse Lent: Week 2


I am sitting here, on this beautiful day, reflecting on this past week of Lent. I can't help, but be reminded that this time last week I was sad and felt like a failure because my first blanket wasn't done. I was feeling sorry for myself, I was too busy, and I didn't have time, but I was missing the point: this wasn't about me. This Reverse Lent was about loving and caring about children because God loves these children and called them to my heart. Then there was also the fact that I was blessed to be busy with work, not everyone has a job or is able to work, and to be busy with school, not everyone can afford an education. I was selfish to complain. Now, I will admit they there are times when you need to complain, to vent, and to release that frustration, but it isn't healthy or beneficial to stay in that place. I left off last week feeling convicted and decided that I would finish the week smiling instead of complaining. The change in attitude proved effective because this week I am feeling blessed and accomplished.

The blanket for the first week of Lent is finished and simple, but beautiful. The blanket was made using Red Heart yarn in Grey Heather using single crochet stitches made with a crochet hook size G (4.25 mm). I originally intended this blanket for one of the All Kids Need Love comfort kits for foster children, but have since decided that the blankets I make during Reverse Lent will be donated to Now I Lay Me Down To Sleep Remembrance (Nilmdts Remembrance). This organization provides comfort kits to families who have lost a newborn or given birth to a stillborn. I was aware of this organization before, but only vaguely. This last week this organization was referred to me by my sister. She knows more about the organization and recognized their need for crochet or knit blankets to include in the comfort kits they send out to families. I knew that I had the ability to help this organization and felt convicted. As I sat thinking about this I realized that this might have been the reason why I had trouble finishing the first blanket on time. 

Yes, I still could have donated the blanket later upon discovery of the immediate need, but then the blanket would have been too large to be donated. Since I was behind, I was able to make the blanket in the size specified in the description: 16" x 16" to 20" x 20". This is significantly smaller than the blankets I intended on making for the foster care children. This much smaller size is much easier to manage. I am now back on track to finish a blanket a week during Lent while still maintaining my busy lifestyle. Even when everything seemed turned upside down this weekend, I was still able to work on the blanket for week 2, and handle the painfulness life sometimes brings. 

This week I have learned that there are times when we need to be weak, when we need to rely on our friends, and when we need to have faith that there is more than we can see or experience in our current state. I do not usually spend my posts reflecting on life or the shared experiences we have, but I feel that Reverse Lent is an opportunity to share more than just my projects, it is time for reflection. Although, the purpose of this blog is not to discuss life or the lessons we learn, I recognize the need to sometimes discuss life, after all it is a journey we all are experiencing. It would take too long to explain why this weekend was painful or why there was a need to be weak, but I can  assure you that the worst of storms will pass leaving you with a rainbow. 

I would like to leave you with a final thought, a passage from The Last Lecture by Randy Pausch:

"Proper apologies have three parts:
1) What I did was wrong
2) I feel badly that I hurt you
3) How do I make this better?
Yes, some people may take advantage of you when answering question 3. But most people will be genuinely appreciative of your make-good efforts. They may tell you how to make it better in some small, easy way. And often, they'll work harder to help make things better themselves.
Students would say to me: "What if I apologize and the other person doesn't apologize back?" I'd tell them: "That's not something you can control, so don't let it eat at you."
If other people owe you an apology, and your words of apology to them are proper and heartfelt, you still may not hear from them for awhile. After all, what are the odds that they get to the right emotional place to apologize at the exact moment you do? So just be patient. Many times in my career, I saw students apologize, and then several days later, their teammates came around. Your patience will be both appreciated and rewarded." (The Last Lecture, Pausch, pp. 162-163)

The only thing you can control in life is yourself so apologize when you need to and be patient with those who owe you an apology. You might never receive the apology you deserve, but that isn't within your control so you can't let the mistakes of others eat at you. Live your life in a way that you can be proud of when you are out of time. 

Sunday, February 22, 2015

Reverse Lent: Week 1

The first week of Reverse Lent is coming to an end and I am already behind. I knew when I set this goal that it would be challenging, but I believed I was up for the challenge. Unfortunately, I didn't anticipate how busy I would be or the sudden onset of my seasonal allergies. Apparently it wasn't just the weather that missed the memo it is still winter. Anyways, I am not giving up on my Reverse Lent, but I just don't have a blanket to share with my readers today. I was feeling down today that the blanket wasn't finished, but I ended up reading my friend's blog that followed her own lent journey and felt inspired. Her blog features a new entry for each day of lent and reflects on her day, including the new lessons she has learned about God. As I read her posts today I thought about the things I have learned as I worked on my own lent journey.

 First, a little about the blanket I am working on as this week ends. I used a single crochet stitch to crochet the blanket in Red Heart Super Saver yarn in Grey Heather. The blanket is a little over half way done and when finished will be accented with Red Heart Super Saver yarn in Turqua. The blanket will be embellished with Turqua roses. The finished blanket will be simple, but will make a sweet gift for any foster child. 

 I mentioned earlier that I have been busy this week and it has been difficult to maintain steady work on the baby blanket, this hasn't been made any easier with the increased fatigue associated with allergies. The point of this is not to complain, but to point out how easy it would be to quit. It doesn't matter the extent of our problems, whether they are little or big, but how we choose to respond to our problems. The friend, whose blog I was reading, has faced so many challenges these last few years, and yet has never given up. She has faced tragedy and loss, but never once quit. She even had the strength to inspire others who were hurting along the way. I have watched how her family has handled their challenges and been inspired to follow her lead. 

This week I choose to face my challenges with my head held high, to persevere, and to not allow my challenges to weigh me down. As I finish the first blanket and move onto the next, while still maintaining my other responsibilities, I am going to do so with a smile on my face. Not because there won't be challenges, but because I know that I am blessed. 

Friday, January 30, 2015

Pattern Review: Crochet Cloche Hats

Crochet Cloche Hats - FREE Pattern
Crochet Cloche Hats

A few weeks ago I was challenged to make one of these hats for one of my little cousins. The picture came from a Facebook post that was shared to my page and the post included a link to the pattern. My response, as it usually is, was that I would look over the pattern and give it a try. Unfortunately, what I didn't know at the time was that the original pattern was written in Russian. The link had another link for the pattern translated into English. This link is the link I used when trying to make the cloche hat.
I spent hours trying to decipher the pattern and have the instructions make sense. Finally I gave up on the written instructions and just focused on the pictures, but unfortunately the pictures didn't show each step of crocheting the cloche hat. In trying to make the pattern work I read the translator's note, which said that the translation was considered troublesome for many people in trying to make this hat. I was very frustrated when I read this because I don't think the translator should have shared the pattern, knowing the translated pattern was done poorly and therefore unusable. I then used Google to try to find a crochet stitch to replicate the pattern, but couldn't find the exact stitch.
Since this hat was meant to be a gift for one of my little cousins I continued working on replicating the hat shown in the picture and managed to make my hat look similar to the hat pictured, although far from identical. I am still working on finishing the floral applique for the crochet cloche hat, but I think my cousin will enjoy wearing it for Easter. I still need to find green yarn to make the leaves, but then I will post pictures of the final hat. If this hat is something that you want to see more of then please leave a comment below. I will be posting more hats for Easter in the next coming weeks.

*********************************************************************************
Update: finished pictures of the Easter Hat


Sunday, January 25, 2015

Stash Buster: Infant Dress and Diaper Cover

If you have children, work with children, or have been around children in the last few months then you no doubt have heard all about Frozen. Frozen was even quite the hit with many adults. I personally have not seen Frozen, but one of my coworkers is a huge fan of Frozen. This coworker is pregnant with her first child, a girl, and I have been wondering how to incorporate Frozen into her baby gift. Then as I was working on another project, the crochet rug from last week's stash buster post, I noticed some white tulle and became inspired. This was the first time I made an infant dress with tulle and yarn as the primary materials. I was a bit hesitant with the outcome, but was pleasantly surprised with the result. This project ended up using several of my crating materials, including all of my white tulle, much of my Red Heart Super Saver yarn in Turqua, and almost all of my snowflake rhinestones. 


I haven't had the time to turn this project into a written pattern, but I can give you a general idea of how I created this infant dress. First, obtain a pattern for the size bodice you want to make. I used my own basic pattern for sweaters and bodices, but there are several great patterns available. I then used a size G crochet hook and the Red Heart Super Saver Yarn in Turqua to crochet the bodice, but stopped before achieving the finished length. I stopped an inch under the armpits of the bodice. I then cut strips of the tulle to form the skirt. I didn't measure the tulle length, but just estimated the desire length of the skirt, and then cut all of the strips of tulle the same size. A helpful hint is to double the length of the skirt when cutting the strips of tulle. Doubling the length allows you to create the skirt without sewing. To attach the tulle strips to the crochet bodice I used a crochet hook and the no-sew method for creating tutus. Fold the tulle strip in half and pull the loop through one of the crochet loops on the bottom of the bodice and then pull the tulle ends through the tulle loop. Pull the ends tight and adjust the tulle so it lays flat against the bodice. Continue in this method until each crochet stitch along the bottom of the bodice has a strip of tulle attached.

Once the tulle skirt was finished I then took fabric glue and attached rhinestone snowflakes in various shades of blue to the strips of tulle. Alternatively you can use sequins. If your strips of tulle are uneven you can trim the tulle, but I recommend steaming the skirt before trimming. Another way to steam tulle is to hang it in the bathroom while you take a shower. The steam from the shower will  cause the tulle to straighten, allowing you an accurate depiction of skirt length. I chose to add rhinestone buttons to the bodice, but this might not be necessary depending on the bodice pattern you used. 

Since I used white tulle that is transparent I decided it was important to make a matching diaper cover. Using the same yarn and crochet hook used in the dress I made a diaper cover. Once again I have not had the time to write a pattern for the diaper cover, but diaper covers are very easy to make. Once the diaper cover was finished I cut pieces of Velcro and attached the Velcro to the diaper cover. I didn't add any embellishments to the diaper cover because it will be covered by the tulle skirt, but if the diaper cover were to be shown I would add a snowflake to the back of the cover.

If you are interested in the pattern for this Frozen-inspired tutu infant dress, please leave a comment below. I was really happy with how this dress came out and look forward to making more tutu dresses. If there are any other tutu dresses you want to see, let me know and I will give them a try.

Sunday, January 11, 2015

Stash Buster: Crochet Rug

It is officially 2015 and that means it is a new year with new opportunities. I ended 2014 with many goals for the upcoming year, both personally and professionally. One of these goals I was able to put into place before the year ended, but the other goals I am actively working to implement as this new year starts, including moving to a new location. The decision to move to a location is a necessary change in the new year, but a decision that has many factors to consider. While I was initially looking at places that had an extra bedroom to turn into my craft room I have recently had to consider the possibility that my craft room will once again need to occupy only a portion of a room. This is not ideal. 

If you have read my previous posts then you may remember that my existing craft space is a portion of an existing room and that this is prone to unorganized chaos. I am working on a more organized craft environment, regardless of location, which means looking into storage options that optimize space while also fitting in with existing decor. I will post these options when I discover the best storage options for a small space. Another option in maintaining organization in a small space is having less craft supplies. I have thought about this dilemma for the last few weeks and cannot seem to just throw out my supplies. Of course there is the obvious option of giving the supplies to a friend or donating the supplies, but I haven't found anyone that really wants the supplies. My solution, as I work on finding a new location, is to make as many projects with my supplies as possible. My intent is to showcase these projects and provide my readers with quick, stash busting projects they make with their own excess craft supplies.

My first stash buster is a crochet rug made from 3 skeins of Red Heart Super Saver yarn in Grey Heather, Coffee, and Turqua. I was actually working on a woman's hat, that just wouldn't retain the right shape, and noticed the 3 colors of yarns lying next to each other. This inspired me to create a project using these skeins of yarns. Initially I thought about designing a baby blanket with these yarns, but then thought the colors would make a nice rug. A rug that has become necessary by the new year's project of replacing the carpet in my home. This was a fairly quick project and very easy to make. I used a size G crochet hook. Since I was planning on making a rug I didn't calculate exact measurements. I cast on the set amount of stitches that would make the rug the desired width and then single crocheted in each stitch with the Grey Heather. I then alternated between the Turqua and Coffee. I continued in this manner until the piece reached the desired size for the rug.
I liked the finished rug so much that I ended up starting another rug using the 3 colors that better fit my decor. The rugs are easy to make and would make an excellent housewarming gift. There is no end to the many color possibilities or yarn choices you could make that would use up your yarn stash. If you make these crochet rugs please share your pictures in the comments below. I would love to see your creativity. If you have any other stash busters you would like me try feel free to leave a comment below. 

Tuesday, April 8, 2014

Charity of the Month: Beautiful and Bald Movement

It is April 7th, which means it is time for this month's charity, Beautiful and Bald Movement. This charity is a personal favorite of mine because of the support they offer to women and children with hair loss due to cancer treatments, alopecia, or trichotillomania. This nonprofit organization was founded by a few women, who were personally responsible for spearheading a social media campaign with the goal of creating a bald Barbie doll for little girls. Since the start of their campaign, Mattel has made 10,000 bald Barbies, which were donated to children's hospitals, MGA made a collection of 6 True Hope dolls in their Bratz and Moxie doll lines, which were available for purchase through ToysRUs, and American Girl started offering their custom dolls without hair along with allowing girls to send their dolls to the American Girl hospital to have their hair removed. Besides spearheading the social media campaign these women have also created and sent out thousands of Dome Decorating packages.

Each Dome Decorating package contains headbands, scarves, stickers, and temporary tattoos for decorating the recipient's newly bald head. The women are constantly in need of donations for these packages and ask crafters for fun headbands, headwraps, etc. to be made for these packages. Last year I donated several handmade headbands, crocheted from my own original pattern, to the Beautiful and Bald Movement. However, I cannot find the photo collage I made using the pictures of these headbands. I am actively looking for the picture and will upload the photo as soon as I can locate it. This year I have made a headband, using another original pattern, that better fits current trends and this pattern is the pattern I am sharing below.

Crochet Ribbed Headband

Materials:
Red Heart Super Saver yarn, color of choice
Crochet Hook Size G
3 Buttons, for closure
Flower embellishment, optional

Directions:
Row 1 - Cast on 8, single crochet all stitches, turn
Row 2 - Single crochet in back loop only, this is the start of the rib stitch, turn
Row 3-4, Repeat row 2, turn
Row 5 - Increase in first and last stitch of row, turn
Row 6-8 - Repeat row 5, turn
Row 9-53 - Continue rib stitch, no increase, turn
Row 54 - Decrease in first and last stitch of row, turn
Row 55-57 - Repeat row 54, turn
Row 58-63 - Continue in rib stitch, creating button loops over 5 rows
Cast off

Finishing:
Cut off remaining yarn and weave in loose ends. Attach buttons to cast on edge so they line up with button loops on cast off edge. Attach a  flower embellishment.


These headbands are quick and easy to make, which makes the headbands a perfect donation for the Beautiful and Bald Movement. Information about requesting a Dome Decorating package or donating your headbands can be found on the Beautiful and Bald Movement's website, which is linked above. At the time of writing this post the website was down, but hopefully will be working again at time of post.

Friday, March 28, 2014

Etsy Update and Viewer Poll

I have been fairly busy lately with many projects and more hours at work that I have been neglecting my Etsy shop. It has been almost two months since I added anything to my shop, patterns or products, and I have been contemplating updating my shop. I have a few ideas in mind for spring, but would love my readers' input for what to includei in my Etsy shop.

Which hat or hats, pictured below, would you like to see in my Etsy shop? Leave your comment below.

Tuesday, March 25, 2014

Christmas Preparation: Handmade Gift Planning

The little bear elves are busy at work on Christmas gifts in BooBear's Workshop. Wouldn't that be nice if elves, bear or otherwise, took over making handmade gifts for you? Well until then it is just me and my busy fingers working away on gifts for Christmas. Every year I make at least one handmade gift, usually it is at least 5 homemade gifts, but poor planning leads to a chaotic December. Working well into Christmas Eve just trying to finish your handmade gifts while your family wonders where you have wandered off to or why there are no gifts under the tree from you is not how anyone wants to spend Christmas. 

Last month I posted templates for a Christmas planner with the promise I would show how to use the templates throughout the year. This month I am showing you how to use the homemade gift planning templates. If you haven't done so already download the template and print it out. Take your favorite colored pen and get ready to brainstorm. I have been brainstorming for awhile and this year I am planning on making a zebra 3pc pajama set and a men's crochet sweater. I will likely add to this list, but these gifts are going to take the most time.

Handmade Gifts
Now that you know what you want to make, it is time to start planning. How long will it take you to make each item? Error on the side of caution when deciding the length of time. If you usually make blankets in a month then plan for two months, giving yourself plenty of time for errors and life to get in the way. Once you know how much time it will take plan out time to work on the project using the monthly calendars. Depending on your level of interest in the project you might want to start and finish the project right away or you might want to procrastinate and finish the project later in the year. Whether you decide now or later make a plan and stick to the time. If you need to reschedule time to work on the project then reschedule, but stick to the new scheduled time.

Know your project and the materials needed to complete the project. Record the materials needed using the template provided in the Christmas planner. If you don't want to purchase all of the materials now then make sure to record what materials you have already purchased. Depending on the materials used I recommend purchasing the materials now when you know where they are and how much you need. Certain materials are seasonal or temporary features at the craft store. These materials should be purchased as soon as you know you need them because they will not be available all year long.

The best thing you can do in homemade gift planning is making a plan and sticking to your plan all year long. As the year progresses I will post pictures of my progress on my own homemade gifts. The pictures will most likely be shown on my Instagram account @BooBearDesigns. Be sure to follow me on Instagram for the latest pictures of my designs and inspiration.

Comment below with your ideas for homemade gifts this Christmas, your favorite homemade gifts that have been given to you, or the homemade gift you made that was the best received by your recipient. 

Friday, March 7, 2014

Charity of the Month: March of Dimes

This month's charity is March of Dimes, a wonderful organization that raises awareness about premature babies through annual walks. While I have always been fond of March of Dimes I never had any personal ties to premature infants until this last month when my friend's baby was born early.  Her baby is doing much better, but I know the outcome may have been different if it hadn't been for the research funded by March of Dimes. I have identified two ways in which people can help premature babies: 1) Crochet, knit, or sew hats for premature babies or 2) Donate or walk for March of Dimes. 

Knit Preemie Hat
My favorite way to help premature babies and their families, or anyone for that matter, is through crafting. While I have many hat patterns for newborns and infants I currently do not have any of my own patterns for premature babies. However, I have found my favorite knit and sewn hat patterns on other blogs and posted the links here. The knit hat shown on the left is from Knitting Up A Storm's blog. I love how easily the hat could be customized with a person's favorite sporting teams.
Sewn Preemie Hat
The sewn hat shown on the right is from Extraordinary Ordinary Life. The tutorial has a lot of pictures and is really easy to follow.

The finished hats can be donated to your local hospital, but read your hospital's donation policy for making hats to donate. Some hospitals require you make a specific pattern. More knit and crochet preemie hat patterns can be found at LionBrand and RedHeart's websites. If you have never checked out these yarn companies' websites I recommend checking them out now because both companies offer tons of free patterns.

If you can't crochet, knit, or sew well enough to make these hats then you can always join a team and walk for March of Dimes. Every year this is my sister's preferred choice of donation. Her and her friends fund raise and walk to raise awareness and money for March of Dimes. This is a great way to give back and a really fun experience with your teammates. There are many ways to use your crafting skills at the walk, including team t-shirts or costumes if you like. This year I am contemplating making team shirts for my sister's team. Comment below if you would like to see a tutorial for a team shirt.

This month you can crochet, knit, sew, or walk for premature babies. Your time and dedication can greatly benefit the lives of these babies and their families. If you don't have the time to make your own hats or to participate in a walk you can always donate to March of Dimes directly.

Is there a charity you want to see featured? Comment below and let me know. 

Monday, March 3, 2014

Quick Gifts: Baby Blanket Play Mat


Today is March 3rd, which means it is time for another quick gift idea. This month's gift idea and tutorial is for  Pastel Baby Blanket Play Mat. In a previous post I showed pictures of my sketch for this blanket, the yarn used, and the progress made on this blanket. The blanket is now finished and I am happy to be able to share this pattern with my readers. I love how quickly this blanket worked up and it is definitely a quick project for a lazy weekend at home. I designed the pattern as a baby play mat, but when the play mat was finished it ended up doubling as a blanket too. I used chunky yarn so the blanket play mat would be thick to provide maxim comfort for a little one playing on the floor. 

Pastel Baby Blanket Play Mat

The materials needed are: 

5 skeins of Bernat Softee Chunky Yarn in Baby Pink,
2 skeins of Bernat Softee Chunky Yarn in Sleepytime
1 skeins of Bernat Softee Chunky Yarn in Baby Blue
Crochet Hook Size N

Project instructions:

With crochet hook Size N and Bernat Softee Chunky Baby Pink, cast on 60 stitches. Cast on 1, single crochet in each stitch across. Continue for 14 rows or until skein of yarn is used up.
Switch to Bernat Softee Chunky Baby Blue and crochet in each stitch across for 3 rows.

Switch to Bernat Softee Chunky Baby Pink and continue to crochet in each stitch across for 42 rows or until you have finished 3 skeins of Bernat Softee Chunky Baby Pink Yarn.

Switch to Bernat Softee Chunky Baby Blue and crochet in each stitch across for 3 rows.

Switch to Bernat Softee Chunky Baby Pink and continue to crochet in each stitch across for 14 rows or until skein of yarn is used up.

Switch to Bernat Softee Chunky Sleepytime and crochet a border around the edge of the blanket. The amount of rows depends on border preference.


Monday, February 3, 2014

Quick Gifts: Basic Crochet Hat

It is February 3rd, which means it is time for a quick gift idea. While each item I will post makes an excellent gift for a loved one, all of the gifts also make wonderful donations for local charities. I personally love to collect patterns or ideas for items that can be made in a day or a weekend. I usually make a portion of these patterns and store the items away to use as last minute gifts. This month's gift is one of those patterns I encourage my readers to make in advance and store. This pattern is a great gift for the little one in your life,  but also is an adorable donation to local charities. 

Since it is February and freezing in every state except California, this month I will be sharing my pattern for a simple crochet baby hat using Red Heart Super Saver Yarn. The pattern is super basic for beginners, but easily customized for advanced crocheters. I currently have a dozen of these hats made in various stages of customization for each season this year and have made countless others for gifts or donations.

Basic Crochet Hat

Pattern instructions written for newborn, toddler, and adult sizes (small/woman's and large/man's). Read instructions carefully to see where the increase stops for the size you are making. Ending stitch count for all hat sizes is in parentheses at the end of each round for instructions for all hat sizes.

Estimated time to complete is a few hours, depending on embellishments used.

Materials Needed:
1 skein of yarn in color of choice
Crochet hook size G
Yarn Needle, optional
Embellishments, optional

Directions
Round 1. 
Make a slip knot on crochet hook, chain (ch) 6, slip stitch (sl) to join, being careful not to twist.
Round 2.
Ch 1, 2 single crochet (sc) in each stitch (st), sl to join first st (12 st)
Round 3.
Ch 1, *2 sc in next st, sc in following st, repeat from * around, sl to join. (18 st)
Round 4.
Ch 1, *2 sc in next st, sc in next 2 st, repeat from * around, sl to join. (24 st)
Round 5.
Ch 1, *2 sc in next st, sc in next 3 st, repeat from * around, sl to join. (30 st)

For newborn size only stop increasing and sc in each st for 10 rounds.
For all other sizes continue to  increase.

Round 6.
Ch 1, *2 sc in next st, sc in next 4 st, repeat from * around, sl to join. (36 st)
Round 7.
Ch 1, *2 sc in next st, sc in next 5 st, repeat from * around, sl to join. (42 st)

For toddler size only stop increasing and sc in in each st for 8 rounds.
For adult sizes continue to increase.

Round 8.
Ch 1, *2 sc in next st, sc in next 6 st, repeat from * around, sl to join. (48 st)
Round 9.
Ch 1, *2 sc in next st, sc in next 7 st, repeat from * around, sl to join. (54 st)
Round 10.
Ch 1, *2 sc in next st, sc in next 8 st, repeat from * around, sl to join. (60 st)

For adult small (woman's) size only stop increasing and sc in each st for 5 rounds.
For adult large (men's) size continue to increase.

Round 11.
Ch 1, *2 sc in next st, sc in next 9 st, repeat from * around, sl to join. (66 st)
Round 12.
Ch 1, *2 sc in next st, sc in next 10 st, repeat from * around, sl to join. ( 72 st)
Round 13.
Ch 1, *2 sc in next st, sc in next 11 st, repeat from * around, sl to join. (78 st)
Round 14.
Ch 1, *2 sc in next st, sc in next 12 st, repeat from * around, sl to join. (84 st)
Round 15.
Ch 1, *2 sc in next st, sc in next 13 st, repeat from * around, sl to join. (90 st)

ALL SIZES
Round 15-17
Ch 1, sc in each st around, sl to join (30, 42, 60, 90 st).
For newborn size only, cut yarn and bind off after round 17.
Round 18-20
Ch 1, sc in each st around, sl to join (42, 60, 90 st).
For toddler size only, cut yarn and bind off after round 20.
Round 20-24
Ch 1, sc in each st around, sl to join (60, 90 st).
For small adult (woman's) size only, cut yarn and bind off after round 24.
Round 25-28
Ch 1, sc in each st around, sl to join (90 st).
For large adult (man's) size only, cut yarn and bind off after round 28.

For all sizes weave in lose ends and embellish hat as you wish.

____________________________________________________________________

These are some of the hats I have made using this pattern. As you can see adding embellishments can really transform these hats into something adorably cute and a priceless gift for the children in your life. If the pattern or hat is listed for sale on my Etsy Shop, BooBear Designs, then a link is posted as a caption under the photo.


Chargers Football Hat
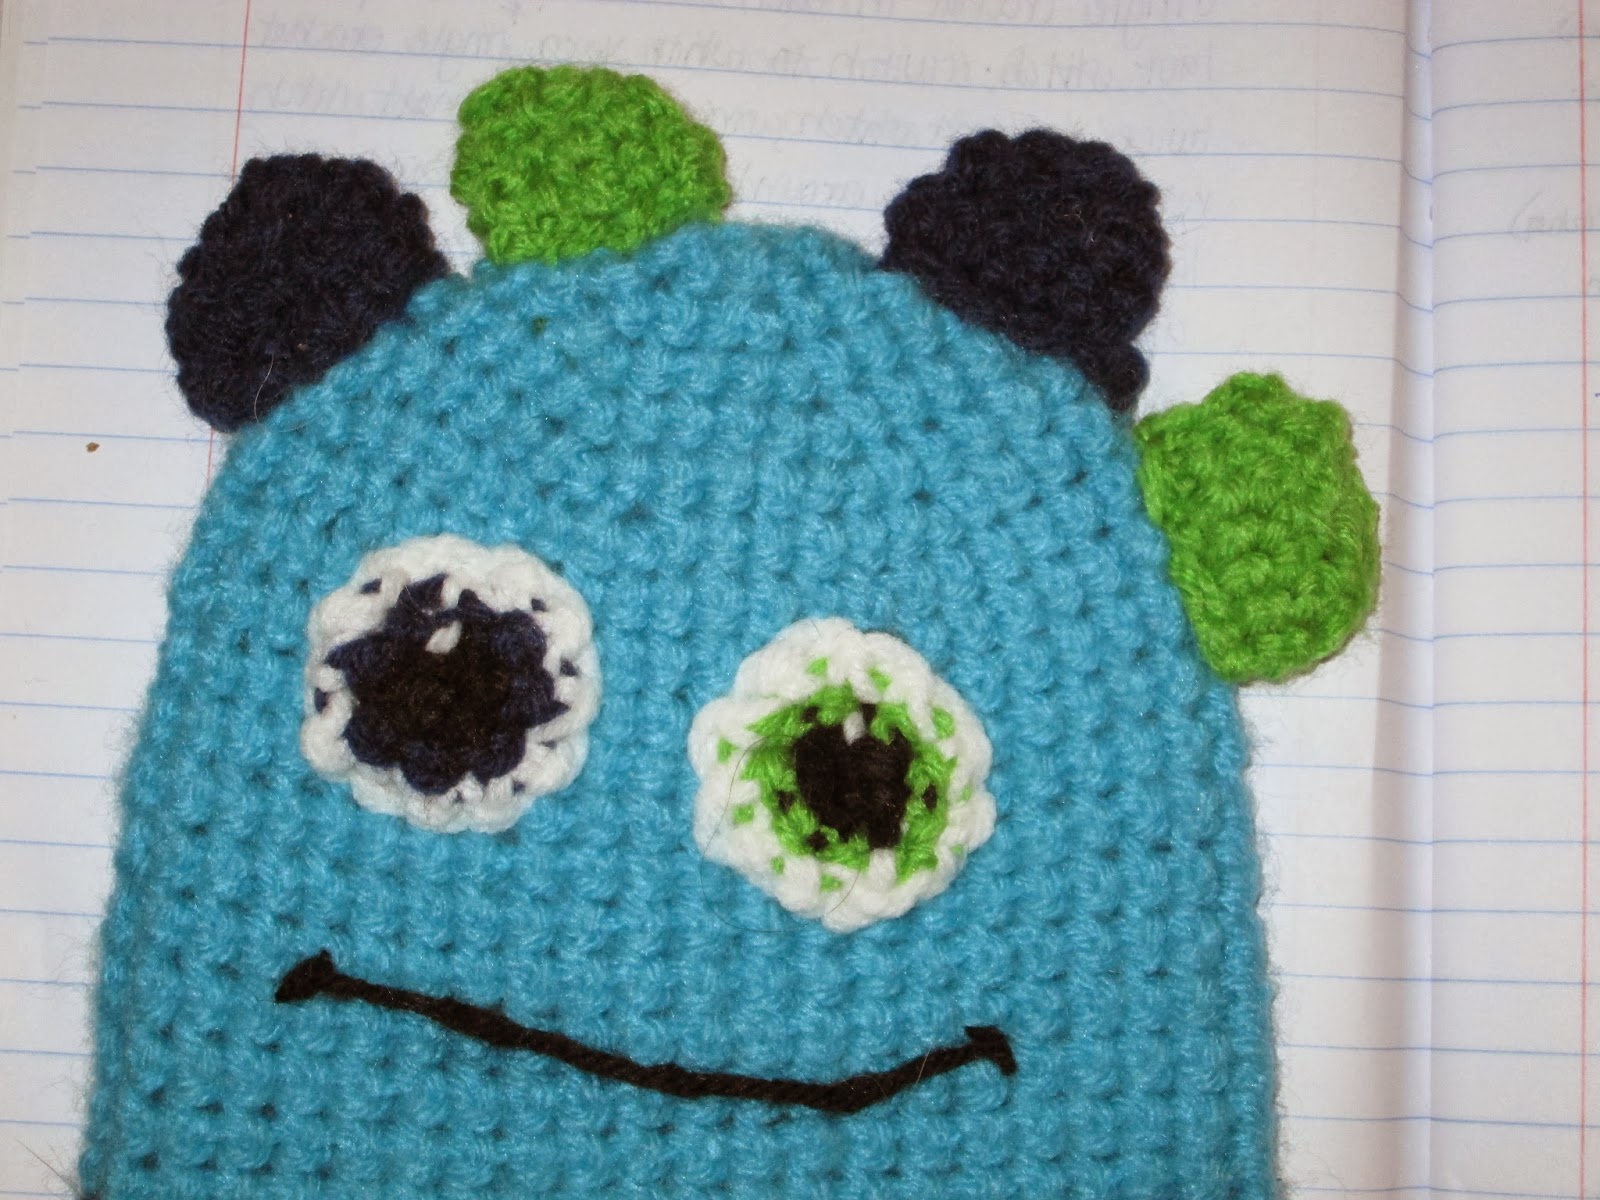
Mike Monster Hat


Sunday, February 2, 2014

Take Me Out To The Ball Game...

Last Sunday was Super Bowl Sunday, which means football is over.
The end to football means the start of baseball season. My New England Patriots lost in the AFL Championship Game and since then I have looked forward to opening day for the Oakland Athletics. As part of my excitement my crafting focus has transitioned from football team hats to baseball hats and team shirts. I am currently working on 4 projects for the Oakland A's season and they are all in various stages of completion. Some will be gifts and others will be sold on Etsy, either in pattern or product form. I don't know which product I am most excited to see completed, but I do know I am ready for all of the projects to be completed. As I write this I am already thinking of more project ideas, which I will probably be sketching soon.

The first project I am working on I thought of during a playoff game in October 2013. After Game 2 of the series, which I was fortunate to watch in person, I was compelled to have a Sonny Gray t-shirt, but when I looked for a shirt online I was unable to find one. Joking with my cousin I came up with the idea for my own Sonny Gray t-shirt. The design is based on a song from the 1970's. I was able to paint my design on a gray t-shirt using fabric paint and freezer paper as a stencil.

The next project was born shortly after this game, after a season's worth of lugging my things around in various bags, without ever being able to store everything. I had a rough idea of what I wanted the bag to look like, but I still needed specifics to make the tote bag truly functional. I started with an inventory list of everything I wanted or needed and then began to sketch out my ideas. I am really pleased with the layout of the bag. I began cutting and sewing the pieces last November, but never finished due to a plumbing emergency. Due to another's human error my toilet ended up broke and my room flooded, which postponed everything and put my craft corner in disarray.

The last two projects are inspired by this month's Fan Fest and the birth of my adorable little cousin. The crochet baseball cap is nearly finished and the yarn is embroidered felt logo is so adorable. I have a rough idea of the baseball hat, but haven't sketched anything or started on this project, beyond actually purchasing the yarn. As always, this and all of my finished projects will be posted on my Facebook design page.

When my craft corner is finally put back together I will definitely be creating more and of course posting more project ideas as well as tutorials. Until then I will post when I can and only projects I can create in my limited space. Be sure to comment below with your own ideas for baseball themed craft projects or projects you want to see in future posts.


Use coupon code FOOTBALL50 at my Etsy Store BooBear Designs for 50% off of my Football Team Hats. This coupon expires February 28th. 

Saturday, January 11, 2014

Go Team!

Chargers
Seahawks
Patriots


Touchdown! NFL playoffs are under way and nothing makes that big win better than a crochet or knit hat in your team's colors! This weekend the New England Patriots, the Indianapolis Colts, the San Diego Chargers, Denver Broncos, New Orleans Saints, Seattle Seahawks, the San Francisco 49ers, and the Carolina Panthers are playing in playoff games. Hats for 3 of these teams are posted above with links to their listing on my Etsy shop, BooBear Designs.

 I realize that not everyone reading my blog enjoys football, but probably most of my readers know someone who is a huge football fan. These crochet football team hats make great baby gifts for your football loving friends and family. Whether you are just starting to crochet or a seasoned professional these hats are for you. I crocheted each of the above hats in only an hour, which makes these hats great emergency gifts for an unexpected baby shower or first birthday.

The pattern to make these hats can be purchased on my Etsy shop, BooBear Designs, or if you would prefer you can purchase one of the hats  I have already made.  Pattern for Football Team Hat

Please be sure to leave a comment below telling me what you think of these hats, teams you want to see made into football team hats, or anything else you hope to see from BooBear Designs in the future.